If you're like me, you've ended up with a hodge-podge of favorite photos, all different sizes, styles, some in color, some in black and white. Perhaps you'd like to display them together on the wall, but need something to unify them...
If you have photo-editing software (like Photoshop), you can scan the photos (or pull up your digital files) and saving under a new name (to preserve your original) start playing around with adjusting the color. By working several photographs with the same treatment (described below), you will unify the photographs visually and with similar frame, achieve unity in your arrangement on the wall. (This technique is also helpful in creating collages/memory books.)
Consider these photos and their treatments:
Here is a photo of my friend, David Pike. It was taken outside on a sunny day at The Inn at Cedar Falls in Logan, Ohio. There is a lot of color in the photo, but I wanted to focus on my friend...
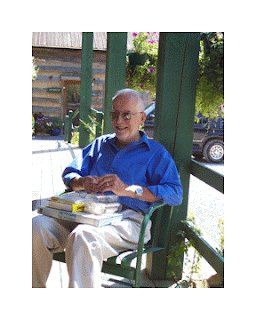 ...so...I have gone into Photoshop, cropped it a bit, and chosen "image" > "adjustments">"photo filter" and "sepia." Which do you prefer?
 Next, here's a photograph of my beloved dog, Buster, from years ago. The original photo was in black and white (taken with film) and scanned into my computer.
 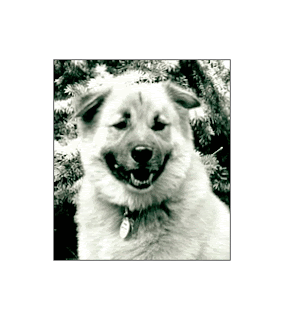 Though I usually love black and white, this seemed too harsh to me. It must have been a sunny day or perhaps the scan was just set at too high of a contrast.
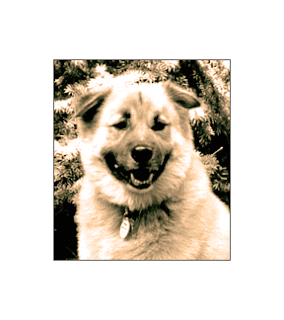
So, I decided to alter this in Photoshop. First, I made sure the "mode" was changed from "grayscale" to "RGB." Then, under "image">"adjustments">"photo filter," I chose "orange 70%" and warmed up Buster's photo. But, in this case, I ended up preferring the original black and white photo. That's why it's important never to work on the original, work on a copy of it.
 Mark and I had gone to a Japanese steakhouse with my sister, Joan, for Mark's birthday in May. It was a lot of fun and we had the waitress take our photo. Unfortunately, their camera setting was off and we ended up looking like we'd been out in the sun too long. Also, Joan's eyes were closed.
 Still, I wanted something to remember this night by in our photo album, so I scanned the file, converted it to "grayscale" in Photoshop, and cropped Joan out of the photo.

Ugh, it looks like a poor newspaper photo... Not really an improvement at all.
I tried sprucing it up by going converting it back to RGB and then going to "image">"adjustments">"hue saturation"> and fooling around a bit with the color. I like this version better. But, it really shows that you have to start with a good photo to get anything worth hanging on your wall. I think I'll save this for the photo album only.

Using photo-editing software, you can tint the photograph to match the warmth or coolness of the room where you are going to display it.
Here's a photo of my bird, Bailey, taken a few years ago. Bailey, like Buster, passed away, and this is one of my favorite photos of her.
 I changed it to sepia and actually like it better. If I were to do an arrangement of photos using the one of David, shown earlier, and this one of Bailey, they would look well together. Let's see...
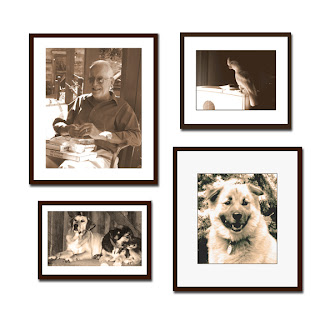
If I work a bit more on Buster's photo (changing to "sepia" and also adjusting the brightness), AND, if I add in a photo of Buddy and Puck (David's dogs). Their photo was in color, but I've altered it to match these. I then put frames around these, still in Photoshop, and could move them around and see just how this arrangement might look on my wall. This sure beats pounding a bunch of holes in the wall as I changed my mind---back in the olden days before computers.
Of course, there is still an art to arranging photos on the wall, once you've got them the way you want each photo to look--and a unified theme or style. Check out Decorating with Pictures by Stephanie Hoppen for tips on that subject (available on Amazon), as is Decorating with Family Photos by Ryne Hazen and Teresa Hazen.
Here are tips from "Mom Central" on displaying family photos.

No comments:
Post a Comment
Comments are closed at this time. Thank you for visiting Appalachian Morning. Please connect with me via my website: www.janicephelps.com.
Note: Only a member of this blog may post a comment.